Rise POS
    • Pricing
    • Support
    Get Started

    How can I add a printer for receipt from Android POS?

    Feb 6, 2021•1 min read•Updated Sep 2, 2023

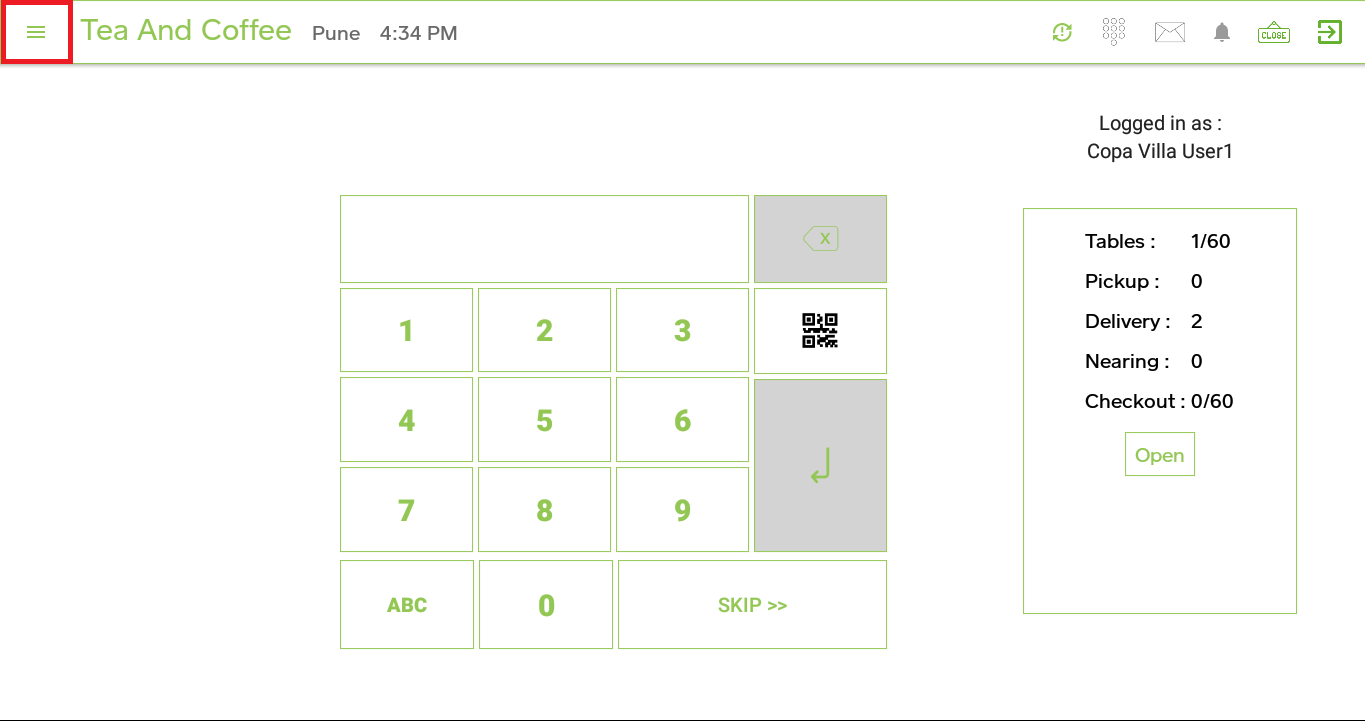
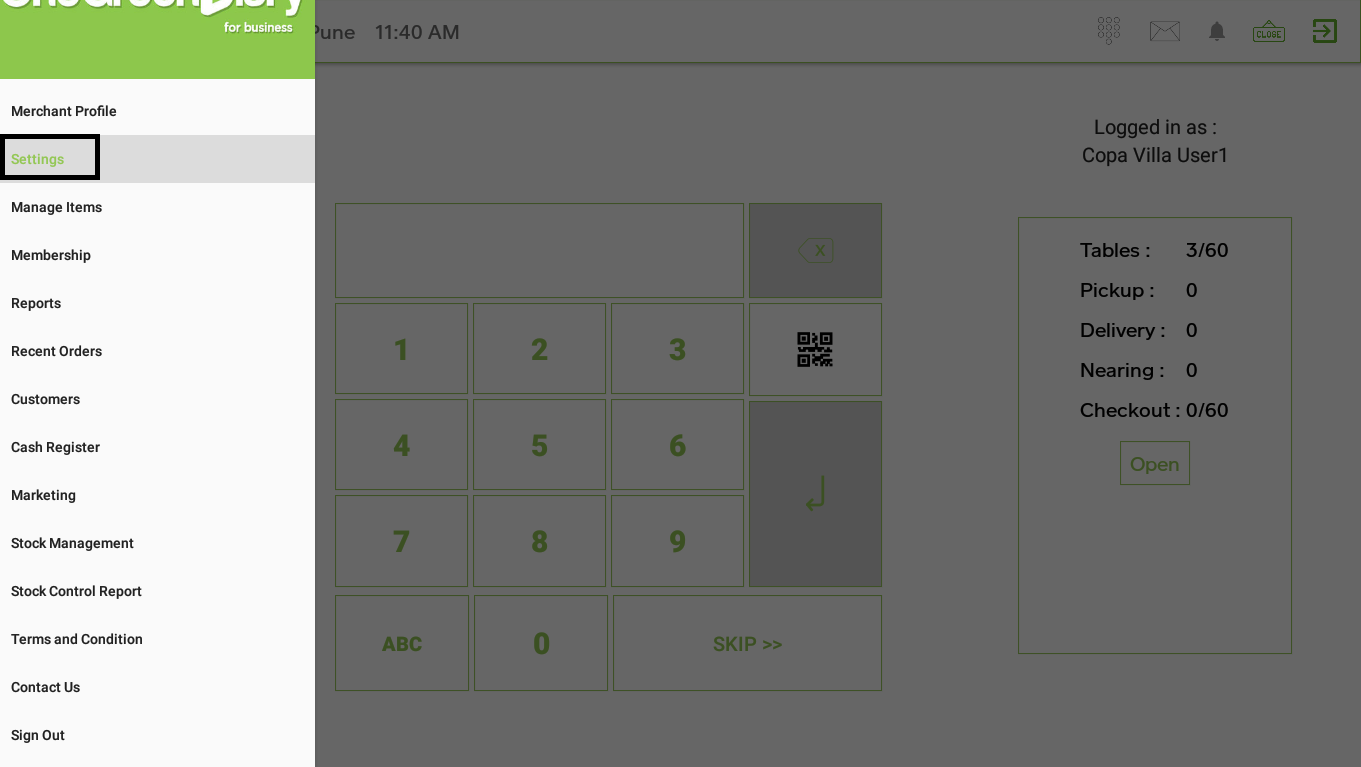
    Go to ‘Settings’ from the menu symbol  

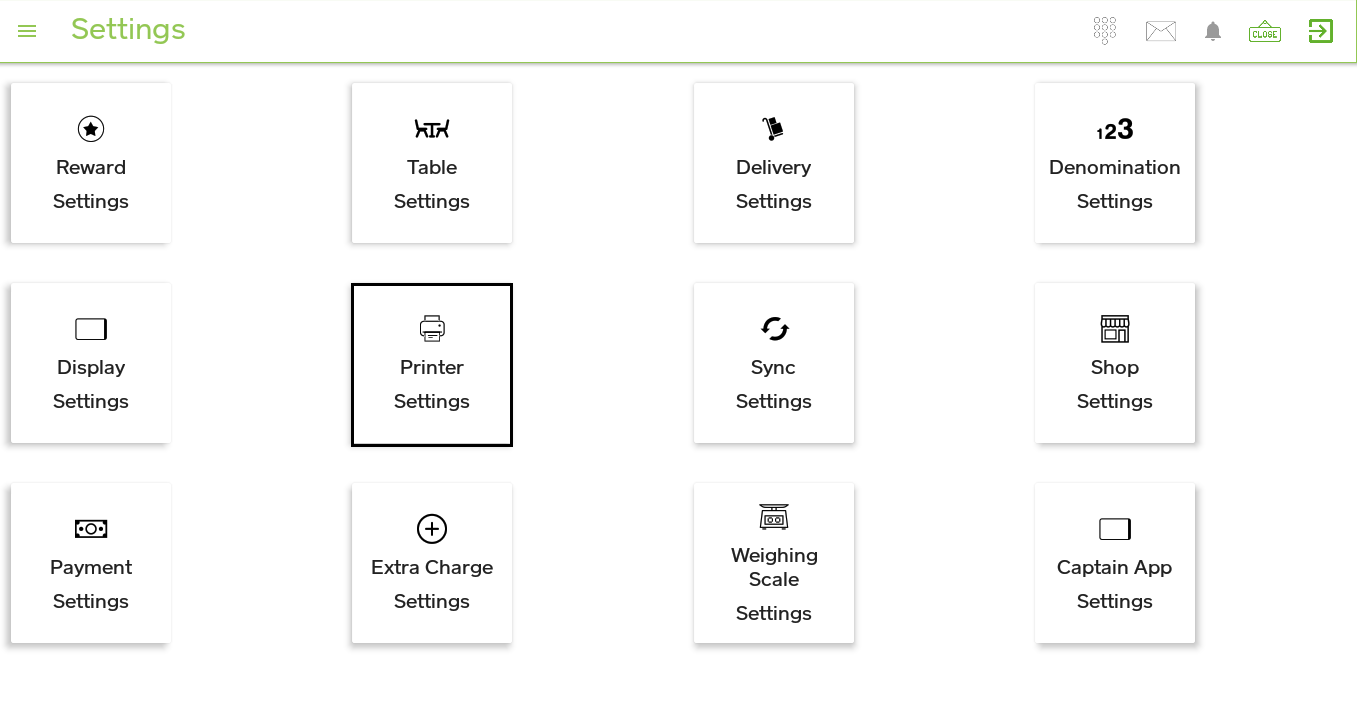
    Select ‘Printer Settings’
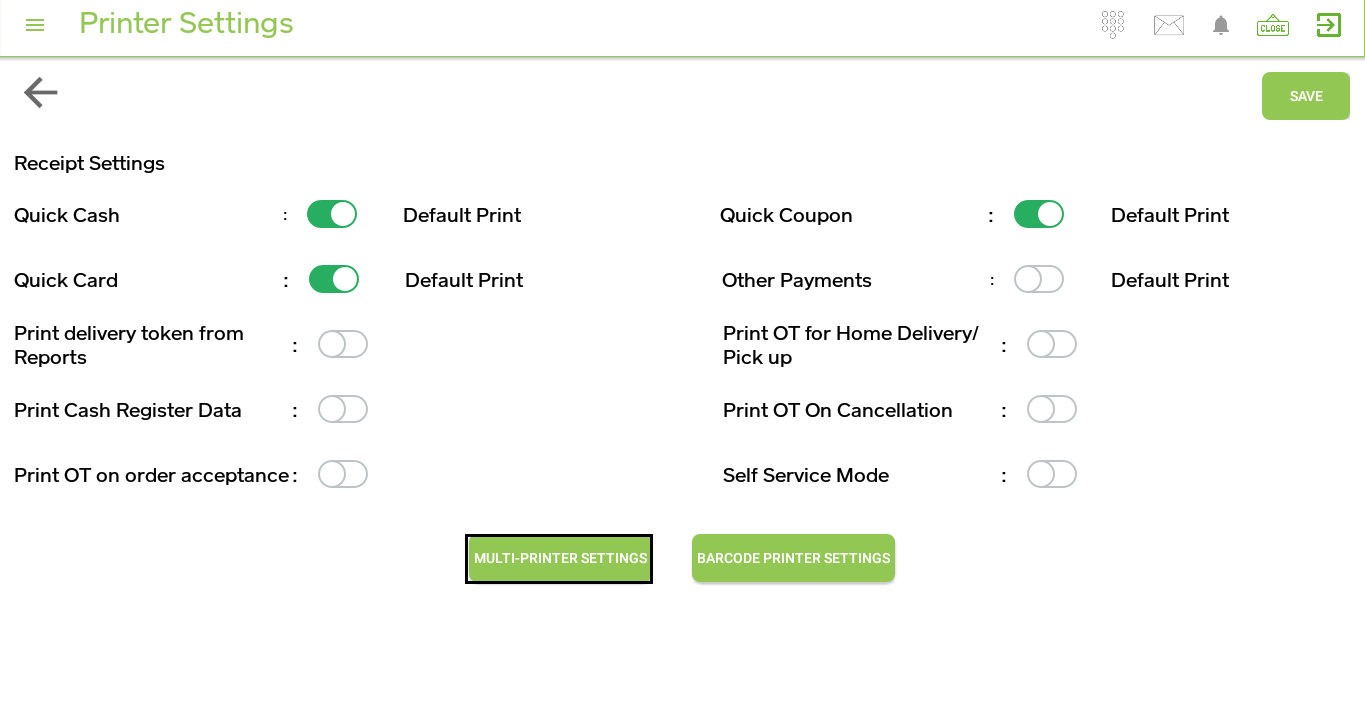
    Enable switch for ‘Quick Cash’, ‘Quick Coupon’ & ‘Quick Card’ and click on ‘SAVE’ button > message will appear ‘Settings updated successfully’ then click on ‘OK’ > click on ‘MULTI-PRINTER SETTINGS’
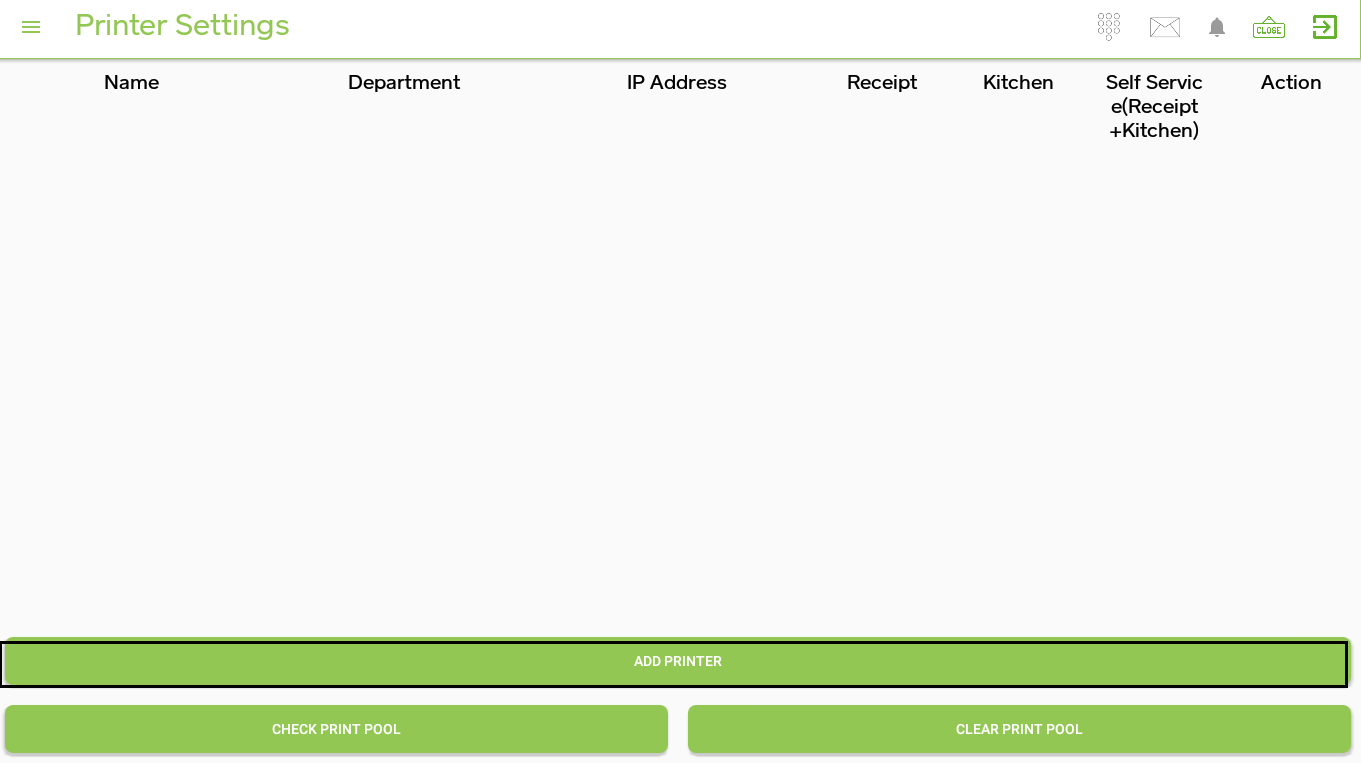
    Click on ‘ADD PRINTER’
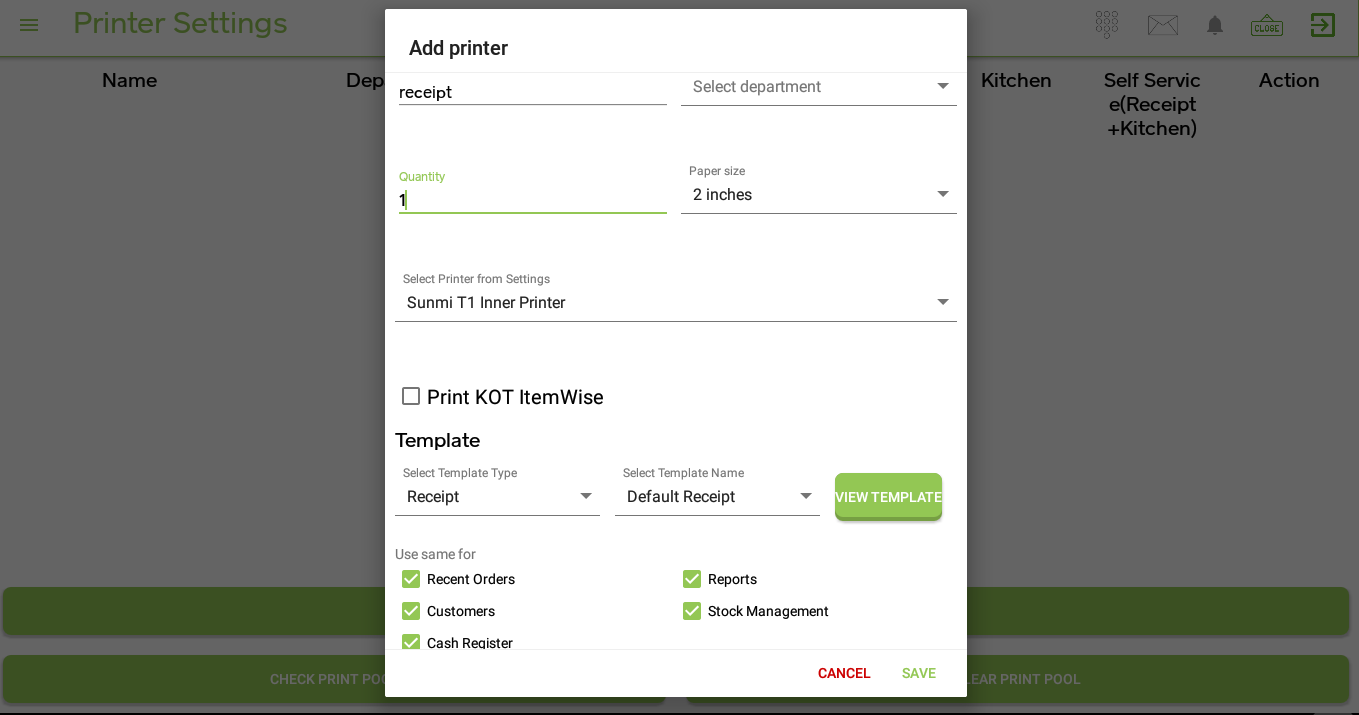
    Enter ‘Printer Name’, ‘Quantity’, select ‘Paper Size’ as ‘2 inches’ for T1 mini and ‘3 inches’ for T1 & T2 machine, ‘Select Printer from Settings’ as ‘Sunmi T1 Inner Printer’ from drop-down options > select ‘Receipt’ in the drop-down option of ‘Select Template Type’ > select ‘Default Receipt’ in drop down of ‘Select Template’ > tick all 5 options under ‘Use same for’
    Click on the ‘SAVE’ button > printer will be added and enable the switch for ‘Receipt’. ( add a printer for receipt )
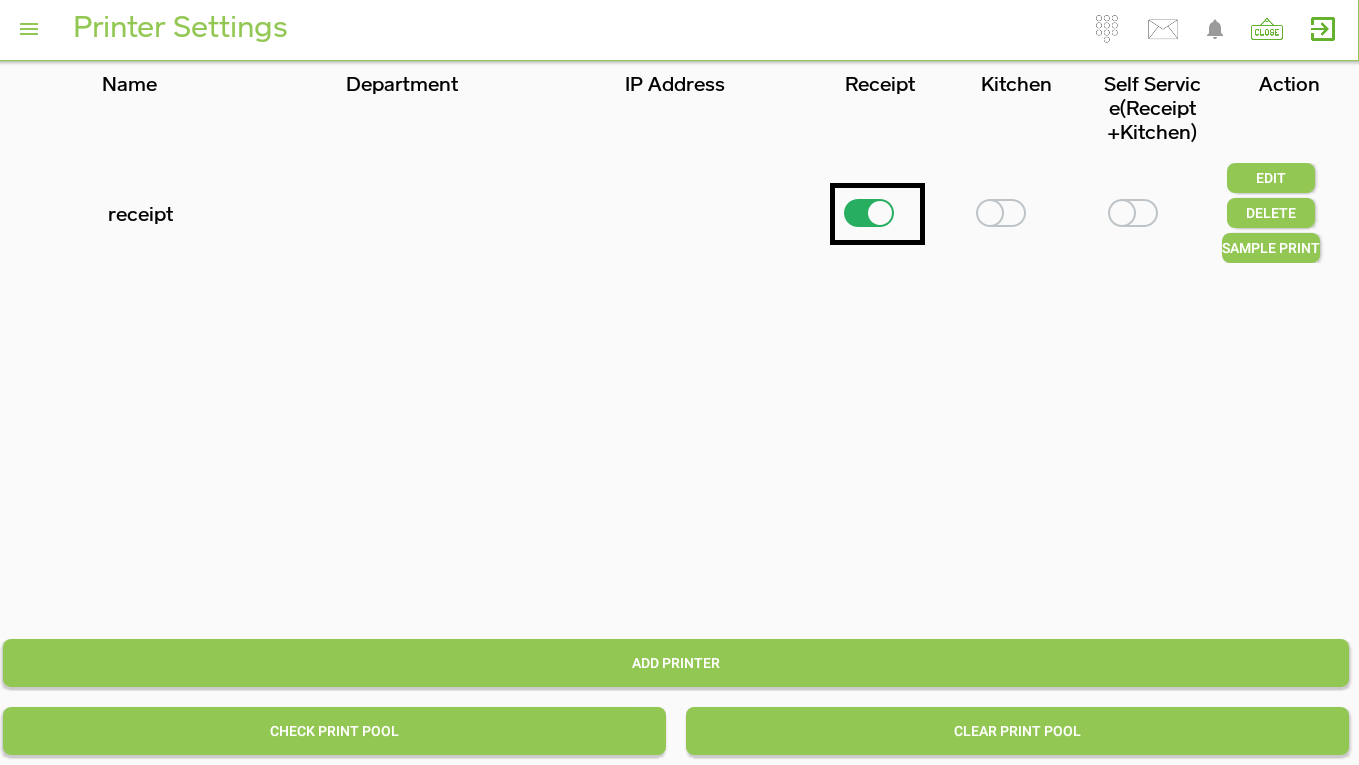
    You can take a sample print by clicking on the ‘SAMPLE PRINT’ button.

    More Help Topics

    Still Need Help?

    Contact our support team for assistance with your questions

    Rise POS

    Cloud-based POS solution for modern bakeries and restaurants.

    4.5 on Google Play

    POS

    • Billing
    • Inventory
    • Production Planning
    • Reports

    Solutions

    • E-commerce
    • ERP
    • Third Party Integrations

    Rise ERP

    • Rise ERP Overview
    • Rise POS Accounting
    • Rise Production
    • Karo HR
    • Stock Ordering App

    Pricing

    • View Plans

    Company

    • About Us
    • Blog
    • Contact
    • Help Center
    • Privacy Policy
    • Terms of Service

    © 2026 Rise POS. All rights reserved.