Rise POS
    • Pricing
    • Support
    Get Started

    How to add a WI-Fi printer?

    Feb 5, 2021•1 min read•Updated Sep 3, 2023

    Please follow the steps for add WI-Fi printer

    Connect LAN to a printer.  (Get IP Address).


    Note: The machine & printer both should be connected to the same network.


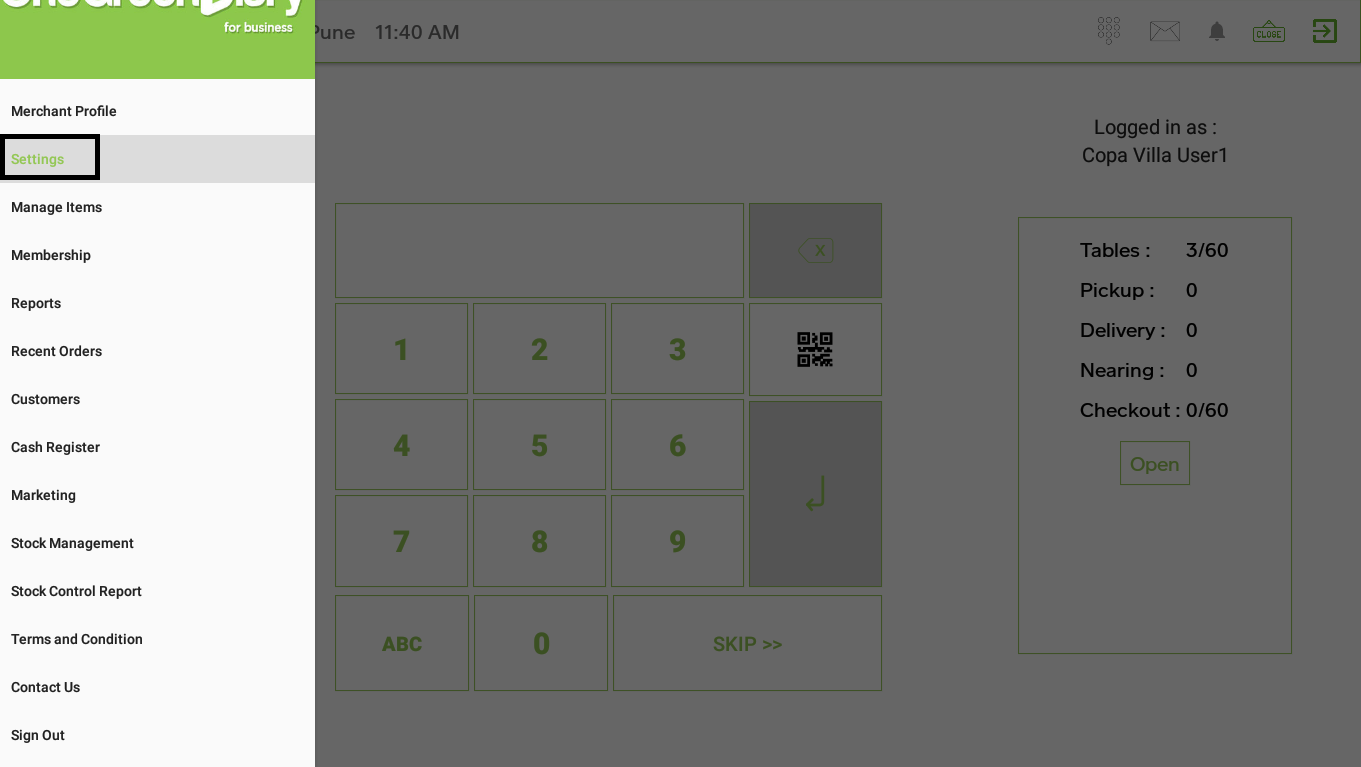
    Open App > go to ‘Settings’ from the menu symbol  

    Click on printer setting > click on “MULTI-PRINTER SETTING”.
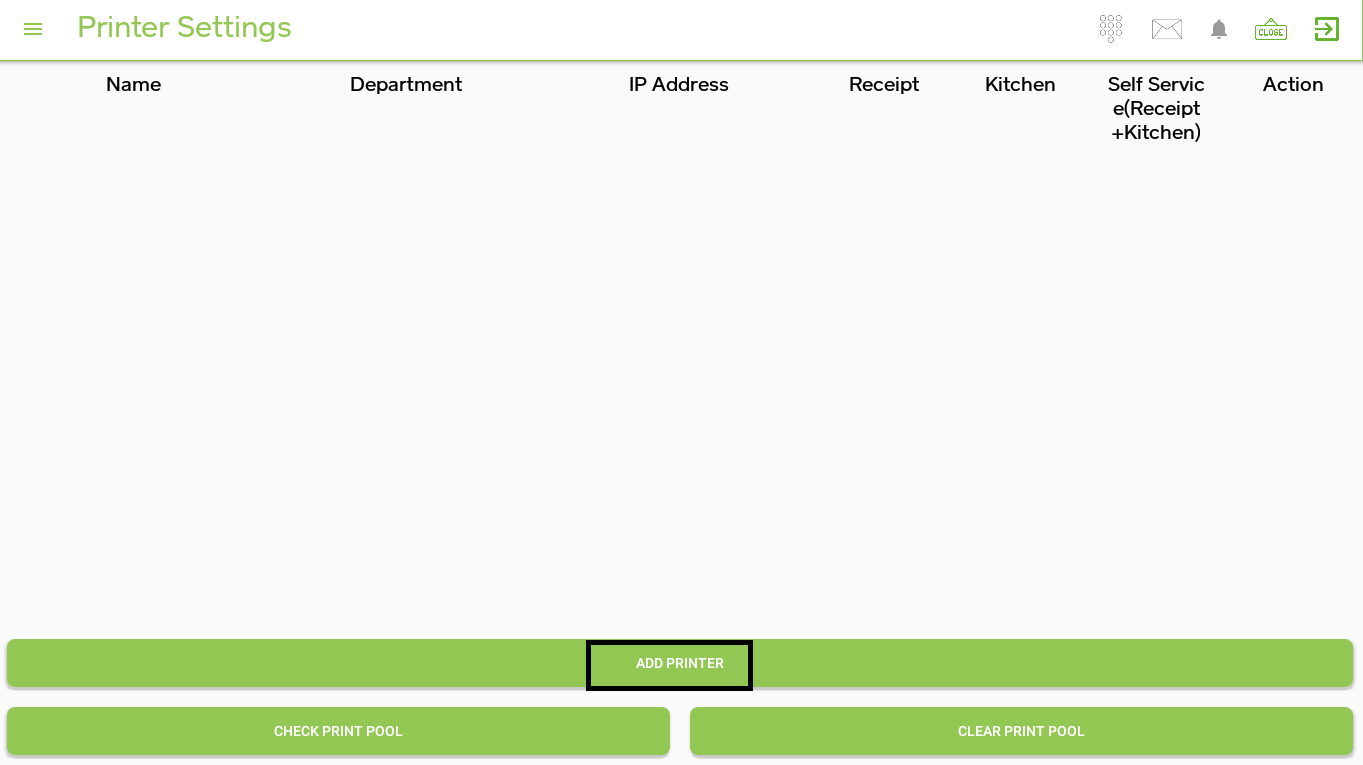
    Click on “ADD PRINTER” > the pop-up will show on the screen.

    • Add below details

               Printer name: As per requirement (KOT/Receipt)

               If the department is present, select the department.

               Quantity :1

               Paper size :3 inches/2 inches.

               Select the Epson WI-Fi printer (add a WI-Fi printer)  from the list of select printers from the setting.

               After selection of printer, it will ask for IP Address > enter IP address like   192.168.1.63

               If adding a printer for a receipt then select template receipt.

               Click on select template > select Template name from the list.

               tick all the checkboxes use the same for.
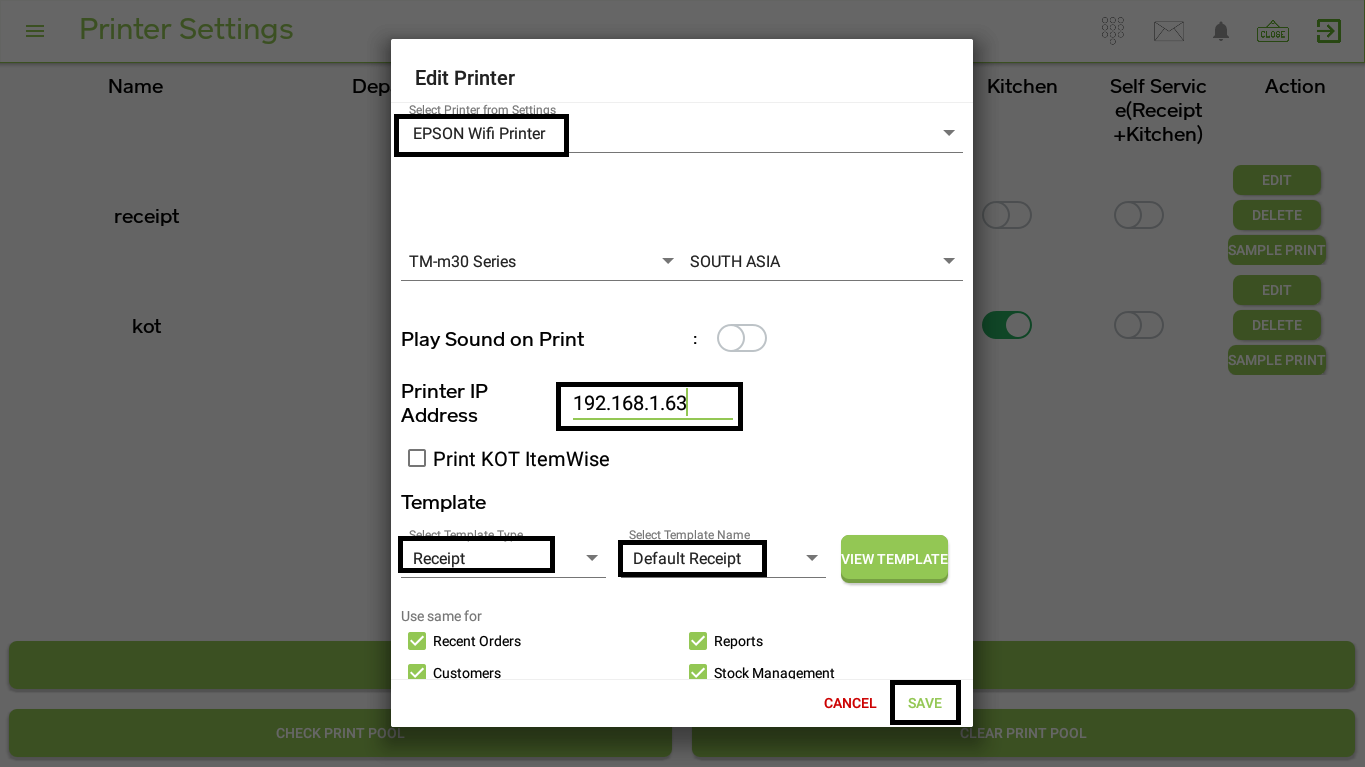
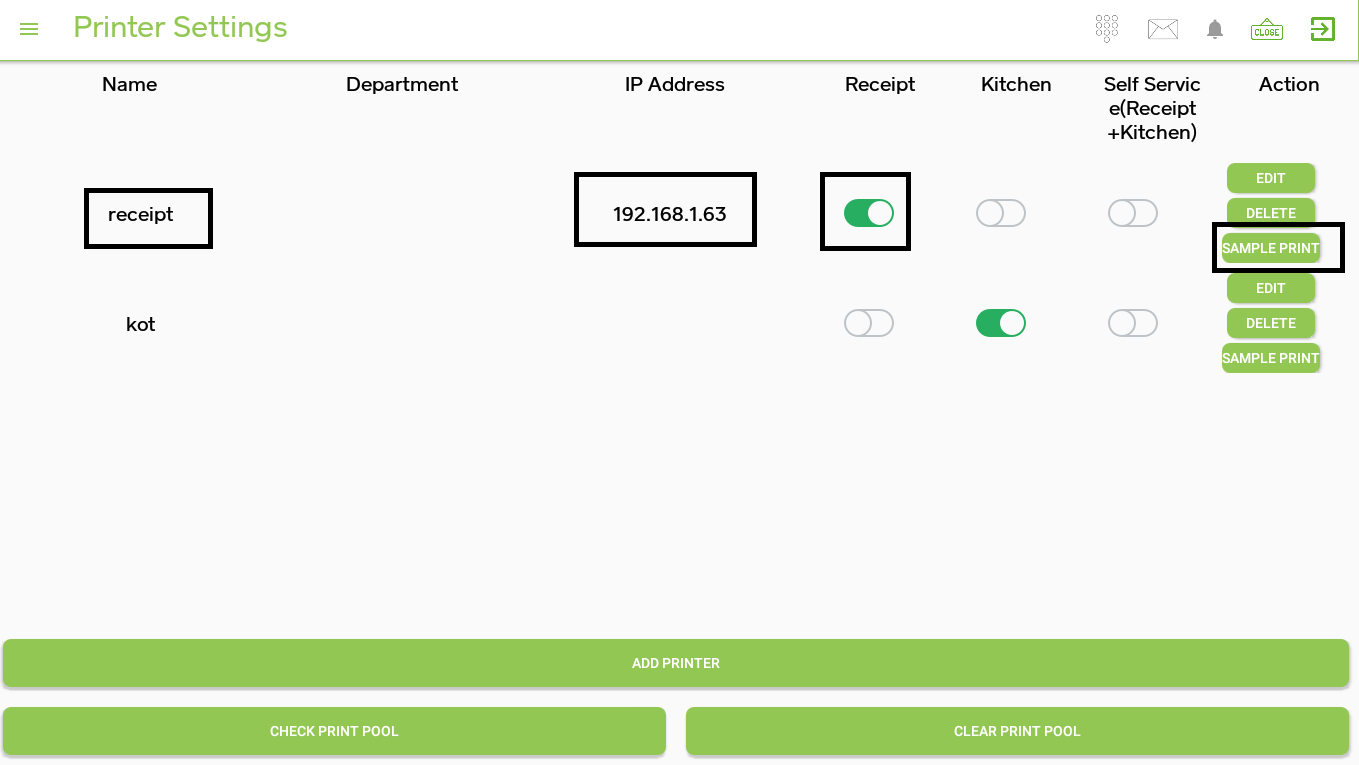
    Click on save. A receipt printer will be created here. Turn on the receipt switch.

    More Help Topics

    Still Need Help?

    Contact our support team for assistance with your questions

    Rise POS

    Cloud-based POS solution for modern bakeries and restaurants.

    4.5 on Google Play

    POS

    • Billing
    • Inventory
    • Production Planning
    • Reports

    Solutions

    • E-commerce
    • ERP
    • Third Party Integrations

    Rise ERP

    • Rise ERP Overview
    • Rise POS Accounting
    • Rise Production
    • Karo HR
    • Stock Ordering App

    Pricing

    • View Plans

    Company

    • About Us
    • Blog
    • Contact
    • Help Center
    • Privacy Policy
    • Terms of Service

    © 2026 Rise POS. All rights reserved.